Installing Fedora Server onto Raspberry Pi 4
A guide to the manual installation of Fedora Server onto a Raspberry Pi 4 with UEFI booting from a USB mass storage device.
This guide aims to install Fedora Server onto a USB drive without any modification to packages, custom builds of kernels, or other changes to the default install of Fedora. In order to accomplish this, a build of UEFI that is specific to the Raspberry Pi 4 is used.
This guide was first written to describe installation of Fedora 32 Server. It has been updated and adjusted to cover installation of Fedora 33 Server.
This guide has been updated to include information on using a customized build of UEFI that does not require manual disabling of the RAM limit.
Note that the instructions in this guide may be adjusted for usage of other Anaconda-based installer images, such as Fedora Silverblue. For installation of Fedora variants that are provided as a raw image, refer to my other guide: Installing Fedora Workstation onto a Raspberry Pi 4.
For a more automated installation that transplants the Raspbian kernel – and later uses custom kernel builds instead of UEFI – refer to Miki Shapiro’s guide to installing Fedora using Ansible.
- Required Materials
- Prepare the Raspberry Pi
- Prepare Target Drive
- Prepare Installer Drive
- Perform Installation
- Recommended Next Steps
Required Materials
This guide will use the following items:
- Raspberry Pi 41 and required peripherals
- USB-C power adapter/cord
- Display
- Keyboard
- Mouse (optional, for use in the Anaconda installer GUI)
- Target USB drive1 with total capacity of at least 4 GiB; 16 GiB or more is recommended.
- Installer USB drive with total capacity of at least 4 GiB
- Another host computer with the following programs installed. These come standard in most Linux and Unix-like distributions:
- sudo (or other means of acquiring permissions for direct read-write access of storage devices)
- fdisk
- mkfs.vfat
- dd
- unzip
- The following files downloaded:
- The latest release of a build of TianoCore UEFI for Raspberry Pi 4: Either my customized build, which allows full RAM access by default, or the official Pi Firmware Task Force build. (PFTF Raspberry Pi 4 UEFI homepage).
- Fedora Server: Standard ISO image for aarch64 or similar2
- When installing Fedora 32, you will also need a recent set of RPMs3 for
kernel,kernel-core, andkernel-moduleson theaarch64architecture. These are unnecessary starting with Fedora 33.
This guide has been tested with the following versions:
- Fedora 32
- Raspberry Pi Firmware EEPROM version 2020-07-31
- Note: This release has been removed from GitHub.
- Pi Firmware Task Force RPi4-UEFI v1.19
- Release 1.6 of the standard Fedora 32 Server installer DVD
- The
kernel,kernel-core, andkernel-modulesRPMs for kernel-5.8.4 on Koji
- Raspberry Pi Firmware EEPROM version 2020-07-31
- Fedora 33
- Fedora 34
- Fedora Linux 35
Prepare the Raspberry Pi
In preparation for installation, set the Raspberry Pi up with appropriate display and peripherals. Remove any existing SD card, and ensure keyboard and mouse are plugged into the black USB 2.0 ports. (This will reserve the blue USB 3.0 ports for the data drives.)
Leave the Pi unpowered for now. It will be powered up once the USB drives have been prepared and inserted into the USB 3.0 ports.
Prepare Target Drive
Prior to installing Fedora Server onto the Raspberry Pi 4, the target drive needs to be set up with a new partition table. The only thing that will be installed by the host system onto the drive will be UEFI; installation of Fedora will happen once the drive is running with the Raspberry Pi 4.
Partition target drive
Start by inserting the target drive into the host computer, ensuring any existing partitions are unmounted, and creating a new partition table.
In this example, the device /dev/sdb is used. The device may differ on your own system; be absolutely sure that it is correct before writing partition table modifications.
[robert@host ~]$ sudo fdisk /dev/sdb
[sudo] password for robert:

Welcome to fdisk (util-linux 2.35.2).
Changes will remain in memory only, until you decide to write them.
Be careful before using the write command.


Command (m for help): o
Created a new DOS disklabel with disk identifier 0x3b6d0995.
Creating a new partition table on /dev/sdb
After creating the new partition table, create the first and only new partition. This partition will hold the UEFI system on a FAT32 filesystem. This partition can be pretty small; in the example, I am giving it 2 GiB so that I’ll have plenty of space for storing screenshots from UEFI.
The minimum size will be close to 128 MiB. It needs to be large enough to hold the updated kernel packages in addition to the UEFI system.
Command (m for help): n
Partition type
   p   primary (0 primary, 0 extended, 4 free)
   e   extended (container for logical partitions)
Select (default p):

Using default response p.
Partition number (1-4, default 1):
First sector (2048-120176639, default 2048):
Last sector, +/-sectors or +/-size{K,M,G,T,P} (2048-120176639, default 120176639): +2G

Created a new partition 1 of type 'Linux' and of size 2 GiB.

Command (m for help): t
Selected partition 1
Hex code (type L to list all codes): c
Changed type of partition 'Linux' to 'W95 FAT32 (LBA)'.
Creating a partition for FAT32 data
When happy with the new partition structure, write the new partition table to the target drive.
Again, be absolutely sure that the correct device has been specified when entering fdisk; otherwise, data loss on your host system may occur.
Command (m for help): w
The partition table has been altered.
Calling ioctl() to re-read partition table.
Syncing disks.
Writing the new partition table to the disk
Format partition for UEFI
Once the new partition table has been created, create a new FAT32 filesystem on the new partition.
The example here displays /dev/sdb1. As above, this device may differ on your own system. Be sure that this device is correct before running this command; otherwise, data loss may occur on your host system.
[robert@host ~]$ sudo mkfs.vfat -v -F 32 -n UEFI /dev/sdb1
mkfs.fat 4.1 (2017-01-24)
/dev/sdb1 has 64 heads and 32 sectors per track,
hidden sectors 0x0800;
logical sector size is 512,
using 0xf8 media descriptor, with 4194304 sectors;
drive number 0x80;
filesystem has 2 32-bit FATs and 8 sectors per cluster.
FAT size is 4088 sectors, and provides 523262 clusters.
There are 32 reserved sectors.
Volume ID is c11a68c3, volume label UEFI       .
Creating a new FAT32 filesystem
Unpack UEFI onto the drive
Before UEFI can be unpacked onto the new filesystem, the filesystem must be mounted.
The mount point is arbitrary; feel free to adjust to one of your own liking
As before, the example uses a device of /dev/sdb1. Make sure the command you use matches the device on your own system.
[robert@host ~]$ sudo mkdir /mnt/rpi-uefi
[robert@host ~]$ sudo mount /dev/sdb1 /mnt/rpi-uefi
[robert@host ~]$ cd /mnt/rpi-uefi
Mounting and changing directory into the new FAT32 filesystem
Now that the new filesystem is mounted, unpack Raspberry Pi 4 UEFI into it:
[robert@host rpi-uefi]$ sudo unzip ~/Downloads/RPi4_UEFI_Firmware_v1.19.zip
Archive:  /var/home/robert/Downloads/RPi4_UEFI_Firmware_v1.19.zip
  inflating: RPI_EFI.fd
  inflating: Readme.md
  inflating: bcm2711-rpi-4-b.dtb
  inflating: config.txt
  inflating: fixup4.dat
  inflating: overlays/miniuart-bt.dtbo
  inflating: start4.elf
Unpacking UEFI into the new filesystem
As a personal preference, I disable the rainbow splash screen that is displayed by the Raspberry Pi’s bootloader. With the latest Pi bootloader, some boot information is displayed first, followed by the UEFI splash screen. Inserting a rainbow square between those two screens seems redundant.
This command is optional:
[robert@host rpi-uefi]$ echo "disable_splash=1" | sudo tee -a config.txt
disable_splash=1
Disabling the Raspberry Pi’s rainbow splash screen
The next step to copy RPMs is for Fedora 32 installations only; installation of Fedora 33 or higher can skip to unmounting the target drive below it.
In addition to UEFI, also copy the updated kernel packages to the UEFI partition. This will assist in updating the kernel later, as the kernel that gets installed with Fedora 32 does not support the Raspberry Pi ethernet interface. Updates to the kernel do support the Raspberry Pi hardware.
robert@host rpi-uefi]$ sudo cp -v ~/Downloads/kernel-*.fc32.aarch64.rpm .
'/var/home/robert/Downloads/kernel-5.8.4-200.fc32.aarch64.rpm' -> './kernel-5.8.4-200.fc32.aarch64.rpm'
'/var/home/robert/Downloads/kernel-core-5.8.4-200.fc32.aarch64.rpm' -> './kernel-core-5.8.4-200.fc32.aarch64.rpm'
'/var/home/robert/Downloads/kernel-modules-5.8.4-200.fc32.aarch64.rpm' -> './kernel-modules-5.8.4-200.fc32.aarch64.rpm'
Copying updated kernel packages to the target USB drive
Now that UEFI is installed, unmount the target drive and clean up the directory that it was mounted on:
[robert@host rpi-uefi]$ cd -
/var/home/robert
[robert@host ~]$ sudo umount /mnt/rpi-uefi/
[robert@host ~]$ sudo rmdir /mnt/rpi-uefi/
Unmount of target USB drive and clean up of host mount directory
The target drive is now ready. Remove it from the host computer and plug it into one of the unpowered Pi’s blue USB 3.0 ports.
Be sure to leave the Raspberry Pi off for now. Attempting to boot with only UEFI and no installer or operating system may cause it to automatically adjust configuration and change default boot to PXE, which causes problems later.
Prepare Installer Drive
Now plug the installer drive into the host computer. As with the target drive, ensure that any existing partitions are unmounted before continuing.
To set up the installer, do a direct write from ISO to drive.
As with partitioning the target drive, this example command will copy directly to /dev/sdb. This command must be updated to reflect your system layout and to point to the correct drive; otherwise, data loss may occur on the host computer.
[robert@host ~]$ sudo dd of=/dev/sdb if=~/Downloads/Fedora-Server-dvd-aarch64-32-1.6.iso bs=4M conv=nocreat,notrunc status=progress
1962934272 bytes (2.0 GB, 1.8 GiB) copied, 15 s, 131 MB/s
472+1 records in
472+1 records out
1981200384 bytes (2.0 GB, 1.8 GiB) copied, 52.3175 s, 37.9 MB/s
Copying Fedora 32 Server installer to installer USB drive
Once the write has completed, remove the drive from the host computer and plug it into the second blue USB 3.0 port of the unpowered Raspberry Pi 4.
Perform Installation
The Raspberry Pi 4 is now ready to be powered on and Fedora installed.
A note about UEFI’s RAM limiter
For Raspberry Pi 4s with 4gb or 8gb of RAM, UEFI is configured by default to limit the RAM reported to the operating system to 3gb. This is due to a hardware limitation of the Raspberry Pi 4 combined with a kernel bug that only recognizes DMA address limitations for PCI devices. The bug was resolved in Linux kernel 5.8.
To work around this issue with the Fedora 32 installer (which is based upon kernel 5.6), the RAM limit should be left enabled. If it is disabled, xHCI USB will fail and USB will be unusable. This setting can be disabled after installation is completed and the updated kernel is installed.
The Fedora 33 installer uses a kernel version newer than 5.8. If desired, the RAM limiter may be disabled prior to installation.
My customized build of UEFI changes the default to disable the RAM limit. When using the custom build with recent versions of Fedora, it is unnecessary to make any manual changes to the UEFI configuration.
Boot Fedora installer and perform installation
With display cord, keyboard, mouse, target USB, and installer USB all plugged into the Raspberry Pi, it is ready to power up. Connect power, and the Pi will perform a few stages of booting: first the Pi bootloader, followed by UEFI, and then GRUB.
At the GRUB selection screen, choose Install Fedora 32 (as of this writing, the option to Test this media & install Fedora 32 would give errors and fail):

Install Fedora 32 selected from GRUB menu running from the Fedora Installer USB drive
Once the system boots, go through the standard flow to install Fedora 32 Server. Details for installing Fedora 32 can be found at the official Fedora 32 Install Guide.
Please note the following items:
Installation Destination will only list the target USB drive. The installer USB will not be listed or available to select.
When installing Fedora 32, networking will not be available at this point in the installation. The updated kernel will be installed after base Fedora 32 Server installation has completed, and networking will become available with the updated kernel. This limitation does not apply to the Fedora 33 installer.
Once installation has completed, remove the installer USB drive and reboot the Raspberry Pi 4. The installer drive will not be used in this guide again.
First console login [Fedora 32 only; Fedora 33+ can skip]
The next step to log in is required for Fedora 32 installations only; installation of Fedora 33 or higher may skip this step.
After a short while, the Raspberry Pi will boot into a textual login prompt. Log in at this prompt to prepare for updating the kernel.
Fedora 32 (Server Edition)
Kernel 5.6.6-300.fc32.aarch64 on an aarch64 (tty1)
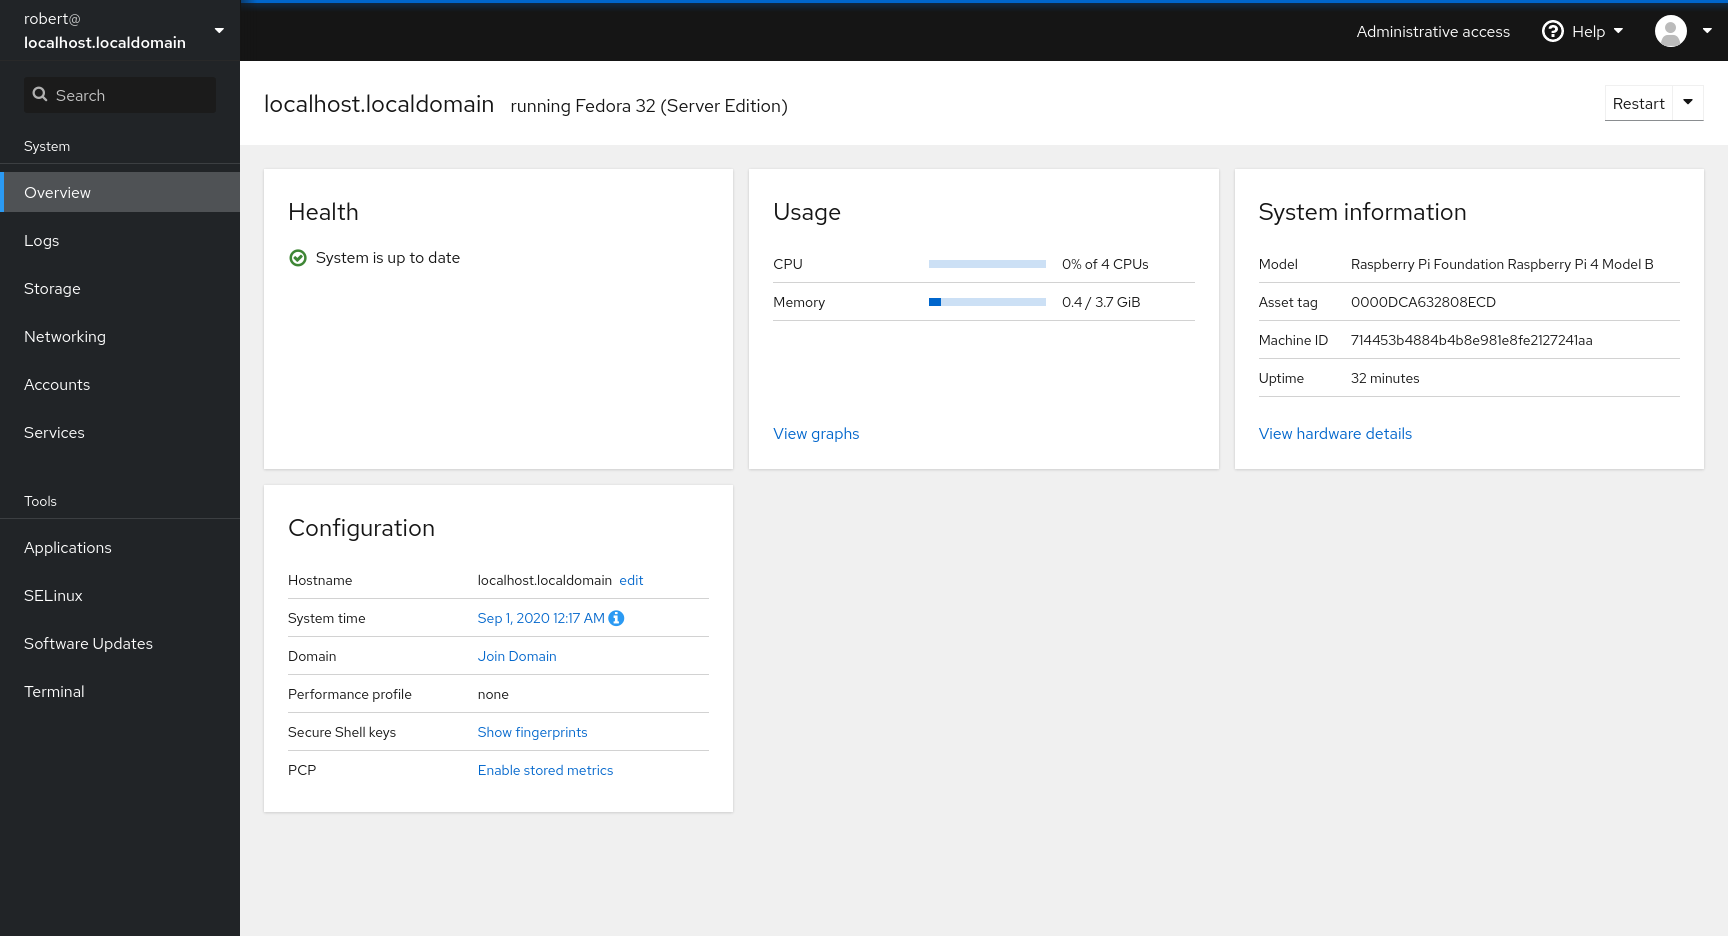
Web console: https://localhost:9090/
localhost login: robert
Password:
Logging into the freshly installed Fedora 32 Server
This login must be performed locally because the kernel on a fresh Fedora 32 installation does not have working drivers for the Pi’s ethernet network interface.
Install updated kernel [Fedora 32 only; Fedora 33+ can skip]
The next step to update the kernel is required for Fedora 32 installations only; installation of Fedora 33 or higher may skip this step.
Mount the UEFI partition to get access to the kernel, kernel-core, and kernel-modules RPMs that were saved into it from the host computer.
[robert@localhost ~]$ sudo mount /dev/sda1 /mnt

We trust you have received the usual lecture from the local System
Administrator. It usually boils down to these three things:

    #1) Respect the privacy of others.
    #2) Think before you type.
    #3) With great power comes great responsibility.

[sudo] password for robert:
Mounting the UEFI firmware partition
Now that the partition is accessible, install the updated kernel RPMs.
The rpm -U flag is NOT to be used, as the updated kernel should be installed alongside the original kernel.
[robert@localhost ~]$ sudo rpm -v -i /mnt/kernel-*.aarch64.rpm
Verifying packages...
Preparing packages...
kernel-core-5.8.4-200.fc32.aarch64
kernel-modules-5.8.4-200.fc32.aarch64
kernel-5.8.4-200.fc32.aarch64
Installing the updated kernel
Once the packages have been installed, it is no longer necessary to retain them on the UEFI partition. They can be removed:
[robert@localhost ~]$ sudo rm /mnt/kernel-*.aarch64.rpm
Removing package files from UEFI partition
After the updated kernel has been installed, reboot the system.
[robert@localhost ~]$ systemctl reboot
Rebooting Fedora
Configure UEFI to disable the RAM limiter
This step is optional and will only impact Raspberry Pi models with more than 3gb of RAM.
When using my customized build of UEFI, this is unnecessary. The customizations include a change to the default configuration which disables the RAM limit.
When the Raspberry Pi UEFI splash screen shows during boot, press ESC to enter the UEFI main menu.
From the main menu, select Device Manager:

Device Manager selected on the Raspberry Pi UEFI Main Menu
Then select Raspberry Pi Configuration for settings specific to the Raspberry Pi:

Raspberry Pi Configuration selected on the Raspberry Pi UEFI Device Manager Menu
From the Raspberry Pi-specific configuration menu select Advanced Configuration:

Selecting Advanced Configuration from the Raspberry Pi-specific UEFI Menu
Finally, change the RAM limit option menu for options specific to the Raspberry Pi:

Changing the Limit RAM to 3 GB option in the Advanced Configuration UEFI menu
Once completed, press F10 and then Y to save the changes. Then return to the main menu through a series of ESC and select the Reset option.
When the Raspberry Pi boots up again, the UEFI-imposed RAM limit will be disabled and Fedora will have full access to the RAM.
Recommended Next Steps
Congratulations! Your new Fedora Server has been installed and is ready for use.
The following are recommended but optional steps for the new installation.
Set hostname
To set a static hostname on the fresh install, perform the following command.
Change rpi4.localdomain to the desired hostname for the new installation.
[robert@localhost ~]$ sudo hostnamectl set-hostname --static rpi4.localdomain
Setting the hostname to rpi4.localdomain
Update packages
By the completion of the installation, only the kernel has been updated. It is highly recommended to update the rest of the system now that the Raspberry Pi has a working network interface:
[robert@localhost ~]$ sudo dnf update -y
Updating Fedora 32 on the new installation
The update process will take several minutes depending upon the speed of internet available. Go order and enjoy a pizza while you wait.
In order to use a USB drive as the boot device for a Raspberry Pi 4, the Pi must have a recent-enough bootloader to boot from Mass Storage Devices. More information – including instructions for updating the bootloader – can be found in the official Raspberry Pi bootloader documentation.
As an alternative, UEFI can be installed onto an SD card; however, as of writing, either the Raspberry Pi 4 UEFI build or Fedora does not support accessing the SD card once it has started. In other words, the UEFI partition will not be accessible for updating UEFI or for UEFI’s feature to store screenshots. Because of these limitations, this guide only covers booting completely from USB. ↩︎ ↩︎2
This guide uses Fedora Server as the operating system to be installed. Any variant of Fedora should work as long as the architecture is
aarch64and the image performs an installation via Anaconda or similar tool. Additionally, Fedora 32 variants will need an installer that does not require network access. In other words, the Fedora 32netinstinstaller will not work.Network installs of F32 do not work because the kernel used in the Fedora 32 installer is too old to recognize the Raspberry Pi 4’s network interface. As such,
netinstwill not be able to get network access to complete installation. The installers for Fedora 33 and later have network support and are not impacted by this limitation.An example of one alternate operating system that matches the criteria is Fedora 32 Silverblue (homepage). Note that Silverblue should use
rpm-ostree installinstead ofrpm -iwhen installing the updated kernel in this guide. ↩︎Recent kernel RPMs can be searched on the Fedora Updates System. Stable builds are recommended; for example: kernel-5.8.4-200.fc32 ↩︎