Installing Fedora 32 Workstation onto Raspberry Pi 4
A guide to installataion of Fedora 32 Workstation onto a USB mass storage device for use in a Raspberry Pi 4.
As with my previous guide on Installing Fedora Server onto Raspberry Pi 4, this guide aims to install Fedora 32 Workstation without modification to packages, custom kernel builds, or similar changes. In this way, the running system will be able to receive all updates directly from Fedora repositories.
The instructions in this guide may be adjusted for the installation of other raw image-based distributions as well. For instructions on installing distributions that make use of the Anaconda installer – such as Fedora Silverblue – refer back to my previous guide.
- Desktop Experience
- Required Materials
- Prepare the Raspberry Pi
- Prepare Target Drive
- Finalize Installation
- Recommended Next Steps
Desktop Experience
To help set expectations on what you can get out of Fedora 32 Workstation on your Raspberry Pi 4, here are a few pieces of the hardware that I’ve tested and verified as working or not-working on a default install. For more information, review the Fedora Project Wiki’s Raspberry Pi documentation
What works
- Ethernet
- USB 3.0 ports including Mass Storage Devices
- USB 2.0 ports
What partially works
- HDMI - audio does not work, and resolution is limited to 1080p (no 4k yet)
What doesn’t work (yet)
- Audio - both over HDMI and through the audio jack output
- Graphics drivers - accelerated video decode, OpenGL acceleration, and higher resolutions are all unavailable
- Wi-Fi
- Bluetooth
I fully expect that as development continues, and as drivers get upstreamed into the mainline kernel, that these items will shift upward into the working category. At time of writing, however, they did not work.
Required Materials
This guide will use the following items:
- Raspberry Pi 41 and required peripherals
- USB-C power adapter/cord
- Display
- Keyboard
- Mouse (strongly recommended)
- Target USB drive1 with total capacity of at least 12 GiB
- Another host computer with the following programs installed. These come standard in most Linux and Unix-like distributions:
- sudo (or other means of acquiring permissions for direct read-write access of storage devices)
- fdisk
- mkfs.vfat
- dd
- unzip
- xzcat
- The following files downloaded:
- The latest release of Raspberry Pi 4 UEFI Firmware (homepage)
- Fedora 32 Workstation image for aarch64 (homepage)2
- A recent set of RPMs3 for
kernel,kernel-core, andkernel-moduleson theaarch64architecture; for example from kernel-5.8.4
Prepare the Raspberry Pi
In preparation for installation, set the Raspberry Pi up with appropriate display and peripherals. Remove any existing SD card, and ensure keyboard and mouse are plugged into the black USB 2.0 ports. (This will reserve the blue USB 3.0 ports for the target USB drive which holds boot and root.)
Leave the Pi unpowered for now. It will be powered up once the target USB drive has been prepared and inserted into one of the USB 3.0 port.
Prepare Target Drive
To install onto the target USB drive, some data will need to be gathered about the partitions in raw image.
Determine partition layout of raw image
First, extract the very first sector from the image; this is where the MBR is stored.
[robert@host ~]$ xzcat -c ~/Downloads/Fedora-Workstation-32-1.6.aarch64.raw.xz | dd of=/tmp/extracted-image.mbr bs=512 count=1
1+0 records in
1+0 records out
512 bytes copied, 0.000881519 s, 581 kB/s
Extracting the MBR from the raw image
With the MBR extracted, read the partition table from it with fdisk.
[robert@host ~]$ fdisk -l /tmp/extracted-image.mbr
Disk /tmp/extracted-image.mbr: 512 B, 512 bytes, 1 sectors
Units: sectors of 1 * 512 = 512 bytes
Sector size (logical/physical): 512 bytes / 512 bytes
I/O size (minimum/optimal): 512 bytes / 512 bytes
Disklabel type: dos
Disk identifier: 0x397b1462

Device                    Boot   Start      End  Sectors  Size Id Type
/tmp/extracted-image.mbr1 *       2048  1230847  1228800  600M  6 FAT16
/tmp/extracted-image.mbr2      1230848  3327999  2097152    1G 83 Linux
/tmp/extracted-image.mbr3      3328000 23068671 19740672  9.4G 83 Linux
Reading the raw image partition table
Create new partition table on target drive
Insert the target drive into the host computer, and ensure any existing filesystems remain unmounted. If any filesystems were mounted automatically, unmount them but do not eject the drive.
Now that the information about which partitions are in the raw image has been gathered, create a new partition table on the target drive.
In this example, the device /dev/sdb is used. This may differ on your host system. Double-check now and again before writing the new partition table to avoid data loss.
[robert@host ~]$ sudo fdisk /dev/sdb
[sudo] password for robert:

Welcome to fdisk (util-linux 2.35.2).
Changes will remain in memory only, until you decide to write them.
Be careful before using the write command.


Command (m for help): o
Created a new DOS disklabel with disk identifier 0x7f3f48c7.
Creating a new partition table on /dev/sdb
Create UEFI partition
After creating the new partition table, first create a partition to hold UEFI. This partition can be as small as 128 MiB and should have a partition type of c for “W95 FAT32 (LBA)”
Command (m for help): n
Partition type
   p   primary (0 primary, 0 extended, 4 free)
   e   extended (container for logical partitions)
Select (default p):

Using default response p.
Partition number (1-4, default 1):
First sector (2048-120176639, default 2048):
Last sector, +/-sectors or +/-size{K,M,G,T,P} (2048-120176639, default 120176639): +128M

Created a new partition 1 of type 'Linux' and of size 128 MiB.

Command (m for help): t
Selected partition 1
Hex code (type L to list all codes): c
Changed type of partition 'Linux' to 'W95 FAT32 (LBA)'.
Creating a partition to hold the UEFI system
Recreate partitions from raw image
With the UEFI partition in place, the partitions from the raw image must be recreated with the same sizes. These partitions may be expanded later to fill additional space on the USB drive once the data has been written into the partitions.
The specific commands may vary according to the image downloaded. The example provided here is for Fedora 32 Workstation aarch64 image 1.6.
Take note that the number of sectors specified matches the data extracted from the image - minus one. This is because the first sector is not included when specifying the last sector in fdisk. Using the first partition as an example, the sector count from listing raw image partitions shows 1228800. The number of sectors specified when recreating this should be +1228799.
Command (m for help): n
Partition type
   p   primary (1 primary, 0 extended, 3 free)
   e   extended (container for logical partitions)
Select (default p):

Using default response p.
Partition number (2-4, default 2):
First sector (264192-120176639, default 264192):
Last sector, +/-sectors or +/-size{K,M,G,T,P} (264192-120176639, default 120176639): +1228799

Created a new partition 2 of type 'Linux' and of size 600 MiB.

Command (m for help): t
Partition number (1,2, default 2):
Hex code (type L to list all codes): 6

Changed type of partition 'Linux' to 'FAT16'.

Command (m for help): a
Partition number (1,2, default 2):

The bootable flag on partition 2 is enabled now.

Command (m for help): n
Partition type
   p   primary (2 primary, 0 extended, 2 free)
   e   extended (container for logical partitions)
Select (default p):

Using default response p.
Partition number (3,4, default 3):
First sector (1492992-120176639, default 1492992):
Last sector, +/-sectors or +/-size{K,M,G,T,P} (1492992-120176639, default 120176639): +2097151

Created a new partition 3 of type 'Linux' and of size 1 GiB.

Command (m for help): n
Partition type
   p   primary (3 primary, 0 extended, 1 free)
   e   extended (container for logical partitions)
Select (default e): p

Selected partition 4
First sector (3590144-120176639, default 3590144):
Last sector, +/-sectors or +/-size{K,M,G,T,P} (3590144-120176639, default 120176639): +19740671

Created a new partition 4 of type 'Linux' and of size 9.4 GiB.
Recreating Fedora 32 Workstation partitions on target USB drive
Write partition table and create UEFI filesystem
With the partition table recreated, write it to the target drive.
Again, double-check that the correct drive was specified when entering fdisk; otherwise, data loss may occur on your host system.
Command (m for help): w
The partition table has been altered.
Calling ioctl() to re-read partition table.
Syncing disks.
Writing the new partition table to the target disk
With the new partition table written, create the FAT32 filesystem in the first partition.
[robert@host ~]$ sudo mkfs.vfat -v -F 32 -n UEFI /dev/sdb1
mkfs.fat 4.1 (2017-01-24)
/dev/sdb1 has 64 heads and 32 sectors per track,
hidden sectors 0x0800;
logical sector size is 512,
using 0xf8 media descriptor, with 262144 sectors;
drive number 0x80;
filesystem has 2 32-bit FATs and 1 sector per cluster.
FAT size is 2017 sectors, and provides 258078 clusters.
There are 32 reserved sectors.
Volume ID is 5e803657, volume label UEFI       .
Creating a new FAT32 filesystem for UEFI
Unpack UEFI onto the target drive
Before UEFI can be unpacked onto the new filesystem, the filesystem must be mounted.
The mount point is arbitrary; feel free to adjust to one of your own liking
As before, the example uses a device of /dev/sdb1. Make sure the command you use matches the device on your own system.
[robert@host ~]$ sudo mkdir /mnt/rpi-uefi
[robert@host ~]$ sudo mount /dev/sdb1 /mnt/rpi-uefi
[robert@host ~]$ cd /mnt/rpi-uefi
Mounting and changing directory into the new FAT32 filesystem
Now that the new filesystem is mounted, unpack Raspberry Pi 4 UEFI into it:
[robert@host rpi-uefi]$ sudo unzip ~/Downloads/RPi4_UEFI_Firmware_v1.19.zip
Archive:  /var/home/robert/Downloads/RPi4_UEFI_Firmware_v1.19.zip
  inflating: RPI_EFI.fd
  inflating: Readme.md
  inflating: bcm2711-rpi-4-b.dtb
  inflating: config.txt
  inflating: fixup4.dat
  inflating: overlays/miniuart-bt.dtbo
  inflating: start4.elf
Unpacking UEFI into the new filesystem
As a personal preference, I disable the rainbow splash screen that is displayed by the Raspberry Pi’s bootloader. With the latest Pi bootloader, some boot information is displayed first, followed by the UEFI splash screen. Inserting a rainbow square between those two screens seems redundant.
This command is optional:
[robert@host rpi-uefi]$ echo "disable_splash=1" | sudo tee -a config.txt
disable_splash=1
Disabling the Raspberry Pi’s rainbow splash screen
In addition to UEFI, also copy the updated kernel packages to the UEFI partition. This will assist in updating the kernel later, as the kernel that gets installed with Fedora 32 does not support the Raspberry Pi ethernet interface. Updates to the kernel do support the Raspberry Pi hardware.
robert@host rpi-uefi]$ sudo cp -v ~/Downloads/kernel-*.fc32.aarch64.rpm .
'/var/home/robert/Downloads/kernel-5.8.4-200.fc32.aarch64.rpm' -> './kernel-5.8.4-200.fc32.aarch64.rpm'
'/var/home/robert/Downloads/kernel-core-5.8.4-200.fc32.aarch64.rpm' -> './kernel-core-5.8.4-200.fc32.aarch64.rpm'
'/var/home/robert/Downloads/kernel-modules-5.8.4-200.fc32.aarch64.rpm' -> './kernel-modules-5.8.4-200.fc32.aarch64.rpm'
Copying updated kernel packages to the target USB drive
Now that UEFI is installed, unmount the target drive and clean up the directory that it was mounted on:
[robert@host rpi-uefi]$ cd -
/var/home/robert
[robert@host ~]$ sudo umount /mnt/rpi-uefi/
[robert@host ~]$ sudo rmdir /mnt/rpi-uefi/
Unmount of target USB drive and clean up of host mount directory
Extract raw image onto target drive
With UEFI installed onto the target drive, it is now ready to have the downloaded image installed as well. The image will be extracted for each partition and sent through dd to be written directly to the target drive.
Because the partitions have been shifted, the commands use an ibs (input block size) value of 512 so that the blocks match the sector counts from fdisk. The obs (output block size) will be set to 4K to help optimize writing speeds; this obs can be changed if your USB drive uses differently sized blocks.
For each of the commands the value of skip and count are taken from the partition table extracted from the raw image. The skip value should match the “Start” number, and the count value should match the “Sectors” number.
Each of these commands can be destructive if pointed at the wrong device. Make sure to check the command – especially the of=/dev/sdb section – before running each command
Copy the first partition from the image to the second partition on the target drive:
[robert@host ~]$ xzcat -c ~/Downloads/Fedora-Workstation-32-1.6.aarch64.raw.xz | sudo dd of=/dev/sdb2 ibs=512 skip=2048 count=1228800 obs=4K seek=0 conv=nocreat,notrunc,sparse status=progress
272617472 bytes (273 MB, 260 MiB) copied, 1 s, 273 MB/s
1228800+0 records in
153600+0 records out
629145600 bytes (629 MB, 600 MiB) copied, 3.14985 s, 200 MB/s
Writing data from the raw image’s first partition to the target drive’s second partition
Then copy the second partition from the image to the third partition on the target drive:
[robert@host ~]$ xzcat -c ~/Downloads/Fedora-Workstation-32-1.6.aarch64.raw.xz | sudo dd of=/dev/sdb3 ibs=512 skip=1230848 count=2097152 obs=4K seek=0 conv=nocreat,notrunc,sparse status=progress
1061924864 bytes (1.1 GB, 1013 MiB) copied, 6 s, 177 MB/s
2097152+0 records in
262144+0 records out
1073741824 bytes (1.1 GB, 1.0 GiB) copied, 10.602 s, 101 MB/s
Writing data from the raw image’s second partition to the target drive’s third partition
And finally, copy the third partition from the image to the fourth partition on the target drive.
[robert@host ~]$ xzcat -c ~/Downloads/Fedora-Workstation-32-1.6.aarch64.raw.xz | sudo dd of=/dev/sdb4 ibs=512 skip=3328000 count=19740672 obs=4K seek=0 conv=nocreat,notrunc,sparse status=progress
9899012096 bytes (9.9 GB, 9.2 GiB) copied, 266 s, 37.2 MB/s
19740672+0 records in
2467584+0 records out
10107224064 bytes (10 GB, 9.4 GiB) copied, 293.817 s, 34.4 MB/s
Writing data from the raw image’s third partition to the target drive’s fourth partition
Once the last write has finished, remove the target drive from the host system and plug it into one of the two blue USB 3.0 ports of the unpowered Raspberry Pi 4.
Finalize Installation
The Raspberry Pi 4 is now ready to be powered on for finalization of the install.
A note about UEFI’s RAM limiter
For Raspberry Pi 4s with 4gb or 8gb of RAM, UEFI is configured by default to limit the RAM reported to the operating system to 3gb. This is due to a hardware limitation of the Raspberry Pi 4 combined with a kernel bug that only recognizes DMA address limitations for PCI devices. The bug was resolved in Linux kernel version 5.8.
Fedora 32 Workstation comes with kernel 5.6 by default, so the RAM limit should be left enabled until later. If it is disabled, xHCI USB will fail and USB will be unusable. The RAM limiter can be disabled after the updated kernel is installed.
Boot Fedora Workstation and create login
With display cord, keyboard, mouse, and root USB drive all plugged into the Raspberry Pi 4, it is ready to power up. Connect power and the Pi will go through a series of boot stages:
- The Raspberry Pi 4 bootloader will begin and find the UEFI system partition
- The UEFI firmware installed onto the USB drive will start and search for valid EFI configurations.
- UEFI will launch GRUB from Fedora’s EFI partition
- GRUB will find the
/bootpartition and read the available BLS entries from theloader/entriessubdirectory - The only currently available option (Fedora 32 on Linux kernel 5.6.6) will boot
When Fedora 32 Workstation has completed booting, navigate through the Welcome experience to create a new user account.

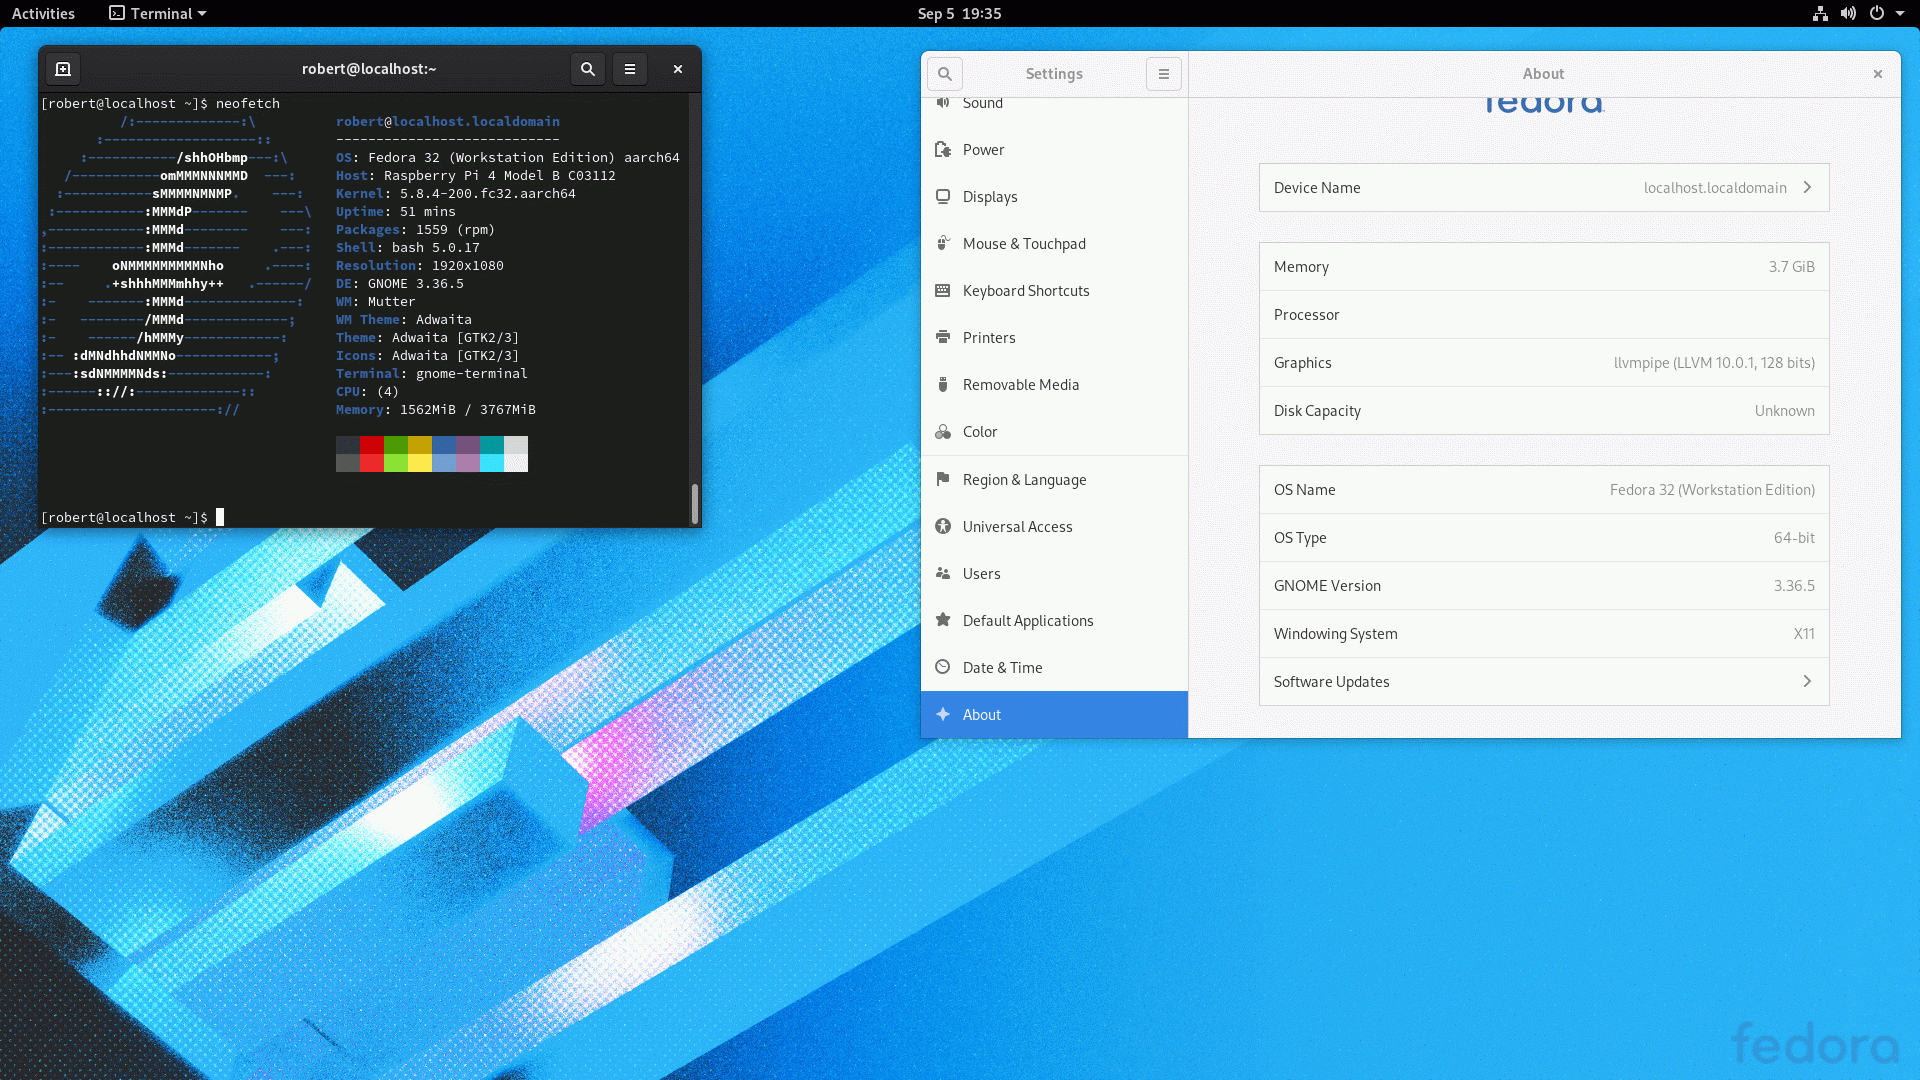
Getting Started with a new install of Fedora 32 Workstation
Install the updated kernel
When the user is logged into Gnome, the UEFI partition is automatically mounted.
From the desktop, open the activities menu and type terminal to open Gnome Terminal.

Opening Gnome Terminal
In the terminal, install the updated kernel with the following command
Be sure to change robert into the username of your new user account.
[robert@localhost ~]$ sudo rpm -v -i /run/media/robert/UEFI/kernel-*.aarch64.rpm

Once the updated kernel has been installed, reboot the system to remove the UEFI limiter and then start using the new kernel.
Configure UEFI to disable the RAM limiter
This step is optional and will only impact Raspberry Pi models with more than 3gb of RAM.
When the Raspberry Pi UEFI splash screen shows during boot, press ESC to enter the UEFI main menu.
From the main menu, select Device Manager:

Device Manager selected on the Raspberry Pi UEFI Main Menu
Then select Raspberry Pi Configuration for settings specific to the Raspberry Pi:

Raspberry Pi Configuration selected on the Raspberry Pi UEFI Device Manager Menu
From the Raspberry Pi-specific configuration menu select Advanced Configuration:

Selecting Advanced Configuration from the Raspberry Pi-specific UEFI Menu
Finally, change the RAM limit option menu for options specific to the Raspberry Pi:

Changing the Limit RAM to 3 GB option in the Advanced Configuration UEFI menu
Once completed, press F10 and then Y to save the changes. Then return back to the main menu through a series of ESC and select the Reset option.
When the Raspberry Pi boots up again, the UEFI-imposed RAM limit will be disabled and Fedora will have full access to the RAM.
Recommended Next Steps
The following are recommended but optional steps for the new installation.
Expand the root partition
There are several options available to resize the root partition. This could have been done prior to the first boot. It could also be done from a terminal. For simplicity of resizing the root partition while it is mounted, this guide demonstrates resizing using the Gnome Disks utility.
To expand the root partition, first open the Disks app from the Activities screen, and then select the root partition (Partition 4)

Root partition selected in the Disks app
Open the menu for partition options and select the Resize... option.

Selecting the Resize... option
In the Resize Volume window, select the desired size of the root partition and click the red Resize button at the top right.

Changing the root partition size
The resize will take place and the Disks app will display the status as the partition is being resized.

Partition resize completed
Update packages
As with resizing the root partition, there are both graphical and text-based methods for performing a full system update. This guide will use the terminal
Personally, I find that the Software application hides too much about the current task and overall progress of system updates, so I perform updates from a terminal. Feel free to use other methods for updating.
Open the Gnome Terminal application and run the following command
[robert@localhost ~]$ sudo dnf update -y

Beginning of a dnf update command output
This will take several minutes to complete. If the root partition was not resized prior to installing the updates, Gnome may complain that the root filesystem is running out of free space as well.
After the command has completed, your new installation is complete and the system up-to-date.

The dnf update command has completed!
In order to use a USB drive as the boot device for a Raspberry Pi 4, the Pi must have a recent-enough bootloader to boot from Mass Storage Devices. More information – including instructions for updating the bootloader – can be found in the official Raspberry Pi bootloader documentation. ↩︎ ↩︎2
This guide uses Fedora 32 Workstation as the operating system to be installed. Any variant of Fedora 32 should work as long as the architecture is
aarch64and the variant is provided by a (compressed) raw image.An example operating system that matches the criteria is Fedora 32 Minimal (download page). ↩︎
Recent kernel RPMs can be searched on the Fedora Updates System. Stable builds are recommended; for example: kernel-5.8.4-200.fc32 ↩︎